Showing posts with label Observatory. Show all posts

Friday, 8 April 2022

Observatory clean up

 A little maintenance is required for the observatory, the roof has been sticking a bit lately and I have also wanted to connect the wifi switch module to control the dome movement from inside the house. After all I have had had it a few months now and just never got around to figuring it out.

Observatory Dome Automation.    

The holy grail for this seasoned and now somewhat lazy astronomer is total automation in the imaging process. Long gone are the days of lugging the heavy mount from the shed, desperately avoiding the cat and power cables as you carry the scope across the lawn. On bended knee with one eye open trying to figure out the hour angle of Polaris, balancing, connecting, aligning everything to no avail as the clouds roll in.

151a is now my forth observatory build and the most challenging.


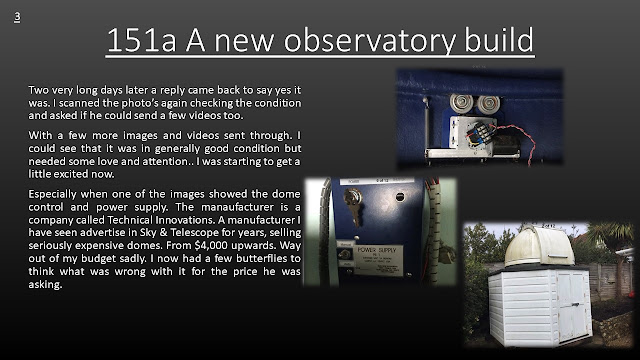
Atop of my observatory I have a 6ft fiberglass dome manufactured
 by American Company Technical Innovations. It has a motor drive system controlled by 2 motors that are set 180 degrees apart around the domes edge. As this power supply is located inside the dome, control is only possible in the observatory. This created issues on a number of levels from pausing an imaging run, going outside and setting off the neighbour’s security lights, moving the dome and returning inside to set things in motion again. With a shutter opening of 60cm the scope has a limited field of view before movement is required when observing or imaging. Doing this every half hour is a little frustrating but what else could I do..

...........................

I follow quite a few Youtube channels following astronomers as they battle their own journey of learning and improving in their hobby. One in particular is “Astrobloke” an astronomer who’s interest is creating a fully automated imaging set up with his roll on / off roof observatory. Over a few months he eluded to a the possibility of controlling his roof by the means of a app using a simple wireless relay. A simple and cheap little box purchased from Amazon for currently £26.

MHCOZY Ewelink WiFi Relay Switch,Self-Locking/Momentary Timer WiFi Switch Module,Compatible with Alexa Google Assistant (4CH WiFi RF 220V) : Amazon.co.uk: DIY & Tools

It. seemed a little to easy to be true and sure enough he got it to work. So I thought I would have a go too.

A few months passed and convinced myself I could not make this work as the internal wiring of the power supply looked just a mass of wires and struggled with getting my head around what was what at what wire went where. So I stripped it all back and rewired sending a supply to the module and outputs to each motor.  


I downloaded an App EweLink and paired via the wifi and pushed the button…It works. After adjusting a few settings the dome moves by itself for 3 seconds whenever it’s needed to move. The next step is to automate this with a programme like Nina or SGP. Astrobloke now says he has developed with another youtuber some open source software that does indeed work via Nina so it is now truly intergrated into his imaging process. This is something I will certainly like to look at but for now I am happy and content with pushing a button every 30 minutes,

The next and final part of the project will be dome shutter control open and close but for now no more getting up, going outside, no more accidental triggering of the neighbours lights, Lazy or what..


Sunday, 16 August 2020

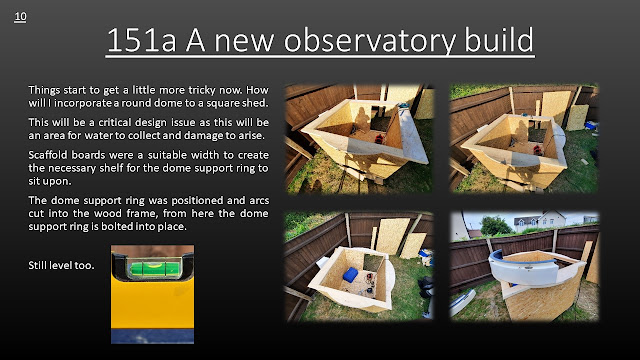
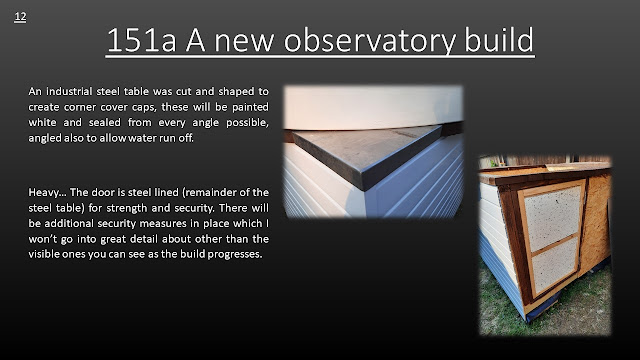
151a A new observatory build.


I have completed my new observatory build for my new scope. I have created a series of Powerpoint pages to show it's build.


If you have any questions please feel free to contact me, Enjoy


As mentioned above there are a few small jobs to complete before official first light.


Saturday, 23 April 2011

Last Light

Sad news fellow bloggers from Saham Observatory. Last light from my observatory maybe anyday now. For four years I have viewed the heavens from what is a reasonable, dark sky. Equipment has performed almost flawlessly giving me some wonderful images I have posted here. But alas all good things come to an end.

Now for some good news. We have a new house, bigger than the last one for our expanding family. and a better view of the southern sky from which to observe. No more trying to observe Orion from behind our roof. No more searching for a cosmic clouds of smoke, but  instead imaging smoke from the neighbours wood burner at two in the morning.

So it is back to the drawing board for me to come up with a new design for the new Hills Observatory. Bigger better, and for heavens sake Malcolm remember the the difference between external wall and internal wall measurements!!!!!!!

So a moving date of the first of june is on the cards. Whether I can get something built before the winter is another thing.

I will keep you all posted as to progress and will be sure to have a detailed photo blog to see the progress throughout construction.

Tuesday, 13 January 2009

More Observatory

The weather is cold the skies are certainly not clear so I thought I would take a few pics of the observatory and the inside.

How About a few more pics


Pic 1 Shows the new 120 watt tube heater. The 1st one died.
Pic 2 The laptop connected via underfloor cables.
Pic 3 One of the wheels that rolls the roof.
Pic 4 I have 2 of these bolts holding the roof in place.
Pic 5 The Imaging set up Guider & Canon in place.

Friday, 25 April 2008

Rebuild Of Roof Structure


Its been a long wait. A measurement error made by me on the internal measurements of the observatory meant that the scope when facing south hit the door of the observatory.
Two options available to me were rebuild the structure or the more favourable raise the scope.

Option two was the preferred choice,

I needed to raise the scope by 14" to allow the counterweight arm to miss the door frame.

I did not have any more of the tubing so I upended a bucket and added some concrete to raise by the appropriate amount. cut some more M12 bar to accept the mounting plate.

The more difficult task was to raise the roof. Again I could completely rebuild a new roof or raise the existing. Due to many factors such as work commitments, WEATHER, I opted for the raise.

I had booked a week off work for this week to do the job.
I had asked 3 members of Breckland AS to lend a hand . Very kindly Barrie Sherrington, Mike Butcher and Gerald North, said yes and to them I am grateful for their help and advice on the the day.

In preparation I had build a framework for the roof to rest upon and eagerly awaited their arrival. Luck prevailed and the weather was fine. So we lifted the roof off and removed the wheels lifted and tested the new framework in place (all OK it fitted perfectly) Reattached the wheels and lifted the roof onto its new home.

The next couple of days were dodging rain and cladding and doing.

As the photo's show the roof is taller than originally wanted but it does mean the scopes do not have to be removed after an imaging session.

Wednesday, 27 February 2008

Observatory

I like many of my fellow members of Breckland Astronomical Society have a great deal of kit that needs careful setup and aligning, before you can even contemplate taking a picture. Here is where the dilemma begins.

Dilemma 1 ..To find a practical and easy solution to minimise set up procedure.

Dilemma no 2.. I have a small back garden with a garden shed & my daughters Wendy house and we didn't want another shed losing even more space.

The solution was to have something as small as possible just to house the scopes for imaging.
as my observing is generally done at our Society's Great Ellingham observatory I didn't mind and was happy to compromise on a small observatory.
The conclusion as then to build a purpose built roll on roll off roof shed. I have no experience with fibreglass to consider a dome,
so this was the easier option as all the work will be done by myself.

Tuesday, 26 February 2008

Observatory


The observatory would be small I planned a 5 foot x 3 foot in size just enough
to house the scopes. I first dug a nice deep hole for the pier, and cemented in the corners using concrete blocks. Mixer kindly loaned by and transported by family.


For the pier I used a piece of 10" industrial drainage tube it was buried into
the ground by just over 2 and half feet. I reinforced the hole with re bar.

The pier is completely isolated from the shed so free from vibration, you will soon see I have a custom made platform for the mount which I also use on a Steel pillar that is concrete mounted
at Great Ellingham.


The framework for the observatory was made with treated 3 x 2 clad then with OSB board after being filled with polystyrene then finally shiplap was clad on the the outside.


I designed a roll off roof structure that again I built myself again cladding and felt to complete.

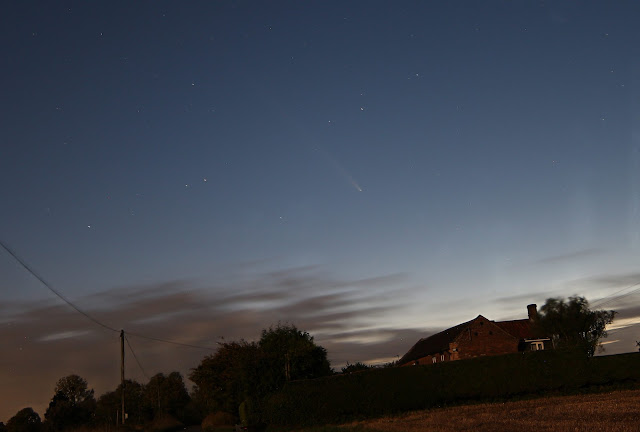
Comet Tsuchinshan-ATLAS, C/2023 A3 , Comet A3,

  A cosmic wanderer, Comet Tsuchinshan-Atlas or more commonly known as Comet A3 has traced its elliptical path through the solar system, a j...