Weather forecast for the next week or so pretty shocking again. I would love to capture it 1 more time as it fades into the background. I am very happy with the depth of detail captured.
Friday, 14 February 2014
Wednesday, 12 February 2014
Amateur Astrophotography Ezine
We are all aware of the way social media platforms have changed communication around the world. So many different ways in which we can bring our hobby not only to your own towns / clubs & societies but to the world. This has been done recently by my friends at http://www.amateurastrophotography.net/ The creators of this great page uses social media platforms like twitter, Flickr & facebook to attract amateur astrophographers like myself to share their passion, experiences, stories & photographs . With facebook members at last count 720 this is a rapidly growing membership have been treated to what is the only online magazine dedicated to amateur astrophotography. 11081
Issues no 1 & 2 can be found here.
Issue 1 Issue 2


Issue number 3 is due soon. The cover I thinks looks exciting and will be as packed as the first two I am sure.
Note in this issue Observatory build.
I regularly post my pics to their facebook page and I recieved some great feedback about this Blog you are now reading. It was suggested that my own observatory build would make a great feature and hopefully inspire the readers to undertake their own projects. I have yet to see the article but cannot wait for the readers to see it. It would also be great to see my hit counter go supersonic just like the first mag went. Here's hoping for a sucessfull issue 3 Good luck guys.
If there are any readers who want any info on my build please feel free to leave a comment here or email me. malcolmdentat tiscali.co.uk. remember to replace the at with the @
Issues no 1 & 2 can be found here.
Issue 1 Issue 2


Issue number 3 is due soon. The cover I thinks looks exciting and will be as packed as the first two I am sure.
Note in this issue Observatory build. I regularly post my pics to their facebook page and I recieved some great feedback about this Blog you are now reading. It was suggested that my own observatory build would make a great feature and hopefully inspire the readers to undertake their own projects. I have yet to see the article but cannot wait for the readers to see it. It would also be great to see my hit counter go supersonic just like the first mag went. Here's hoping for a sucessfull issue 3 Good luck guys.
If there are any readers who want any info on my build please feel free to leave a comment here or email me. malcolmdentat tiscali.co.uk. remember to replace the at with the @
More from our nearest neighbour.
Sunday was a day of work for me. Finished early enough to roll back the roof for what was about an hours break before the clouds rolled across at around hrs. This is the first time I have used my William Optics GT 81 triplet refractor for lunar imaging. The focusser on the scope is wonderfully smooth and allowed a quick set up. Imaging at f11.8 I am pleased with detail. Registax calibrated using 70% of the best of 1500 frames. Processed in Photoshop with a layers mask overlay to increase contrast. A high pass filter also used to selectively sharpen. Width across the image approx 1000 km. Centred is my favourite crater on the surface "Plato" Age is anything from 3.2 to 3.8 billion years old. A perfct circular shape has obliterated what was a mountainous area. Appearance in the centre is of a smooth surface formed by lava. There are craters in the central area, not visible at this focal lenth. High walls and steep slopes of 2000 metres are almost perfect aprt fromon the left edge is a partial collapse. I have also neglected to change the image to B & W I like the contrast from the imbrium basin. My second image is again the same focal lenth as before. The 93x93 Km crater "Copernicus" is the showcase of this lunar vista splashed just south of the tail of the Appennine mountain range. It's central peaks rise approx 1200 metres high about the same as the Caign Gorm mountains. Everywhere you look is something different and interesting to look at.

Using the live view record feature I can record using the 5 x magnification feature. Therefore not just a crop of the above image.
I am forever amazed that just an 81mm refractor is capable of this.
On the right edge lies Eratosthenes. Very high slopes and walls require a more oblique angle from the sun to illuminate the walls slightly smaller than copernicus at 60 km's wide. A high pass filter and unsharp masking has teased a little more detail out.
Finally a mosaic of 2 of the images. My intention was not to create a mosaic this time. I was just imaging random objects. 2 line up so here they are.
Thursday, 6 February 2014
Lunar landscape
I have revisited an image / mosaic of the Appennine mountain region after having it professionally printed. What appears on the the screen is not always the same as the printed result. I will have to have this one reprinted soon and look foward to seeing the difference.
Several layer masks and soft light blend modes have increased contrast. Layered sharpening has also allowed the mountains to become sharper whilst leaving the lava plains alone.
Without doubt my favourite area on the lunar surface. The more lunar savvy will spot the landing location of Apollo 15 at Hadley Rille. A previous post does mark the landing site.
If you have never tried this have a go. I recently hooked up the laptop to our big tv. I was stunned at seeing the image so large and lifelike.
Rosette Again
The weather has been awful for most of the UK this last few weeks and I feel for those in my county of birth in Somerset. It has given me the chance to reprocess my 8 hour image of the Rosette nebula. Stacked with calibration frames using Maxim DL. As mentioned before I am using my new learnt skills using Photoshopto process. The use of levels & curves tease out the detail hidden in a master frame. A DDP algorythym in Imagesplus was the software of choice to do this previously. Various blending modes and layer masks allow me more control over the final result. I have mentioned a few times before that I prefere to under process rather than over do it. Each of us has our own way of doing things and it is always fantastic to see others interpretations of these enigmatic targets we choose to image. I am trying to put together a tutorial for my workflow, I will of course share when I have completed it. For now please enjoy my image. I have certainly enjoyed putting it together.
Wednesday, 5 February 2014
Reprocessed B33
I started again from scratch and had a complete reprocess of the Horsehead nebula. Combined now will calibration frames it is certainly a good deal cleaner. Plus I believe practice makes perfect and I am getting more adept at being more subtle with the techniques of Photoshop, less each time is certainly more!. I have also discovered it is to be turned into A3 size and printed very soon, cant wait to see it.
As mentioned previously there was a bright moon not far away at the time of capture.
I am happy with the dusty stuff captured. One thing I have noticed Blogspot appears to brighten the images a fraction from my original.
Sunday, 26 January 2014
M82 Nova Wide field.
For 2 nights in a row we have been treated to clear skies. I have treated my camera again to the amazing supernova in the nearby galaxy of M82. I wanted a wide field shot of the area. Here is the result of 2 hours of exposure in 10 minute sub frames.
I am very happy with the dust lanes in M81. Dark dust visible circling the galaxy core.
Unfortunatly astronomy for the next week will take a back seat. I am working a set of nights from Monday bad timing with the moon out of the way.
Friday, 24 January 2014
Supernova 2014J
Sometimes the luck just holds. Well this time anyway. If you wander back through my blog or find my post on M95 april 2012. The avid nova watchers will remember the eruption in M95 sn2012aw. This happened just as I started at work a set of nights. We only do 2 sets a year and could not believe my misfortune in having to work when the skies were clear. Now go back a little futher to sept 2011 and sn 2011fe in M101. We were about to move and I had dismantled the observatory in preparation.
But not this time fellow bloggers. I had imaged m82 back in Oct testing out my new kit (left pic) and the wow amazing sn 2014J captured just last night 1 day after it's discovery. I am sure at this moment they are searching through Hubble archives to find the progenitor. We know already it is a type 1a and a few theories exist as to the fate of this white dwarf star.
Anyway here is my pic.
I am trying to do a blink comparison aswell. I will post it if I manage it. Any advice would be appreciated.
But not this time fellow bloggers. I had imaged m82 back in Oct testing out my new kit (left pic) and the wow amazing sn 2014J captured just last night 1 day after it's discovery. I am sure at this moment they are searching through Hubble archives to find the progenitor. We know already it is a type 1a and a few theories exist as to the fate of this white dwarf star.
Anyway here is my pic.
I am trying to do a blink comparison aswell. I will post it if I manage it. Any advice would be appreciated.
Sunday, 12 January 2014
The Horsehead Nebula.
With a magnitude -11.8 moon causing a little concern. I thought I would have a play. I have imaged the Horsehead a few times before so I was not banking on a perfect image. I must admit though I am again impressed with the sensitivity of the camera and scope. I captured 3 hours in 20 minute sub frames.
Processed in photoshop only using levels & curves. An unsharp mask & high pass filter has done wonders on the dusty stuff & blended using layer masks. A subtle saturationboost and noise filter applied to complete.
Thursday, 2 January 2014
Imaging the Califoria Nebula @f7
Whilst waiting for the Rosette to be clear of a tree the other night I had a play and took 3x 20 minute exposures of the California nebula. I have imaged this object before with the old set up imaging at @4.96 focal length of 446mm I was achieving a lovely wide field image encompassing the whole of the nebula. The new system is not as fast with the FLT110. Even with the dedicated TMB field flattener there is no reduction in the focal lenth so I now image at f7 at 770mm. So I just wanted to post 2 pics from the old system to the new. I had initial concerns over exposure length with the increase in focal ratio but my concerns were soon dissipated with the sensitivity of the new camera. I will of course need to mosaic a few of the larger targets. I cant wait to post some results.
Addendum
I have been learning a few new processing techniques Below is an update to the above to include a selective unsharp mask anda high pass filter. An amazing difference for 1 hours worth of exposure.
Wednesday, 1 January 2014
Rosette 8 Hours
Rosette Nebula
Subscribe to:
Posts (Atom)
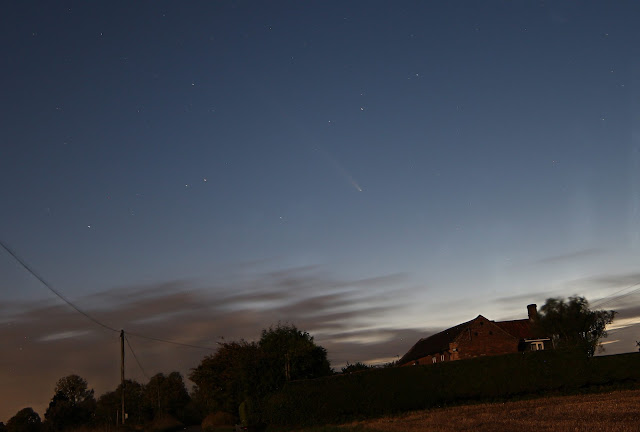
Comet Tsuchinshan-ATLAS, C/2023 A3 , Comet A3,
A cosmic wanderer, Comet Tsuchinshan-Atlas or more commonly known as Comet A3 has traced its elliptical path through the solar system, a j...
-
ASTRONOMER: When you rearrange the letters: MOON STARER Does anyone know any more that are astro related??
-
My previous post of M97 & M108 required further inspection as I could see numerous faint fuzzies about 20 in all. I have highlighted the...


