Monday, 23 May 2022

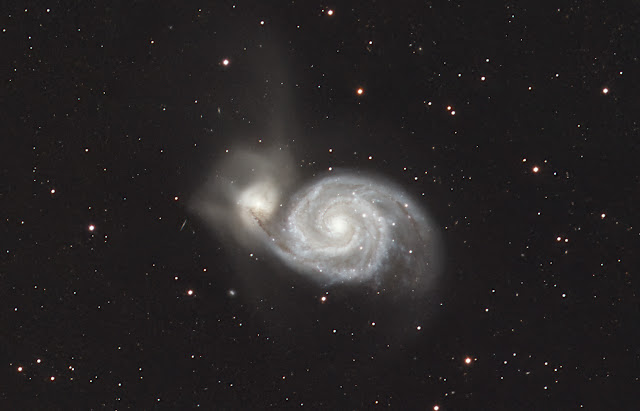
M51 The Whirlpool Galaxy

The usual Malcolm luck happened last month, I closed down the observatory for some maintenance and what do we get a week full of clear skies. Still it gave me chance to get some  jobs complete such as wiring the dome to the wireless controller. Disappointing that the weather was clear but since rebuild, a PA and test of tracking and guiding was needed,  Every set up nicely and as expected and  from there I have managed over 4 nights captured five and a half hours of LRGB data on target.

Guiding has been excellent with excellent with numbers as low as .30 arc seconds accuracy. I will be happy if these numbers continue. As you can see target was M51, always a favourite and captured many times previously. 

     I am always astounded and I love the ZWO Asiair pro for its simplicity in doing almost everything now. Some  lovely new additions to the software update now include now sky atlas and the ability to name filters. There are of course many things that it cannot do including composing mosaics but I can live with it for now simply because there are other pieces of software such as Telescopius that communicates perfectly with the ability to download a CSV file with the mosaic parameters. There are several summer projects that will use this feature so look out for my updates on this feature. 

So the target was M51 using the LRGB filters with an aim for a couple of hours on each filter. In case of bad weather I set the imaging run to 30 minutes a filter. At least I would have something to process if the project fell flat. I have also the zwo electronic focusser so the whole process is totally automated when switching from filter to filter to imaging again takes under two minutes.

A Typical stretched 180 second sub frame (right) A small target for 550mm of focal length but I am hopeful for a decent crop out of the final data stack.

So after three good nights I have managed five and half hours of data with 30x 3 minutes sub frames on RGB and 1 hour of Luminance data.

During bad nights I also took the opportunity and captured a complete set of calibration frames too from darks, dark flats, & Flats.

To top it all I have finally taken the plunge into the technical world of Pixinsight. A scary thought but with the help of some serious video instruction from Adam Block I have created my first image.

Prior to starting the image processing I used Image calibration & Image combination to create all my master calibration frames.

Again this is all very new to me and I followed this process to create my first image.

Calibrated and stacked using the new WBPP (weighted batch pre processing) script new and updated script that works every bit as good as six or seven steps of manual image registration. 

Part of this hobby also includes trawling the expanse of YouTube and looking for videos that suit you knowledge set and by chance I found a chap called Richard Bloch. and found Basic image processing in Pixinsight 1.8, the cover image was of M51 and I was processing M51 so thought it worth a look, Turns out his explanations and information were spot on. I will send him a message to say hello and thank you

Dynamic Crop

Autoomatic background extractor

Colour Calibration

Histogram transformation

TGV Noise

Range select

Unsharp mask

curves.

Final result I am more than pleased with.


Monday, 11 April 2022

System set up


Well everything is all set up again in the observatory and despite a near full moon when taken everything is working well.


A few small tweaks on the aggression settings and guiding  numbers are down to a really impressive set of low numbers.

Friday, 8 April 2022

Observatory clean up

 A little maintenance is required for the observatory, the roof has been sticking a bit lately and I have also wanted to connect the wifi switch module to control the dome movement from inside the house. After all I have had had it a few months now and just never got around to figuring it out.

Observatory Dome Automation.    

The holy grail for this seasoned and now somewhat lazy astronomer is total automation in the imaging process. Long gone are the days of lugging the heavy mount from the shed, desperately avoiding the cat and power cables as you carry the scope across the lawn. On bended knee with one eye open trying to figure out the hour angle of Polaris, balancing, connecting, aligning everything to no avail as the clouds roll in.

151a is now my forth observatory build and the most challenging.


Atop of my observatory I have a 6ft fiberglass dome manufactured
 by American Company Technical Innovations. It has a motor drive system controlled by 2 motors that are set 180 degrees apart around the domes edge. As this power supply is located inside the dome, control is only possible in the observatory. This created issues on a number of levels from pausing an imaging run, going outside and setting off the neighbour’s security lights, moving the dome and returning inside to set things in motion again. With a shutter opening of 60cm the scope has a limited field of view before movement is required when observing or imaging. Doing this every half hour is a little frustrating but what else could I do..

...........................

I follow quite a few Youtube channels following astronomers as they battle their own journey of learning and improving in their hobby. One in particular is “Astrobloke” an astronomer who’s interest is creating a fully automated imaging set up with his roll on / off roof observatory. Over a few months he eluded to a the possibility of controlling his roof by the means of a app using a simple wireless relay. A simple and cheap little box purchased from Amazon for currently £26.

MHCOZY Ewelink WiFi Relay Switch,Self-Locking/Momentary Timer WiFi Switch Module,Compatible with Alexa Google Assistant (4CH WiFi RF 220V) : Amazon.co.uk: DIY & Tools

It. seemed a little to easy to be true and sure enough he got it to work. So I thought I would have a go too.

A few months passed and convinced myself I could not make this work as the internal wiring of the power supply looked just a mass of wires and struggled with getting my head around what was what at what wire went where. So I stripped it all back and rewired sending a supply to the module and outputs to each motor.  


I downloaded an App EweLink and paired via the wifi and pushed the button…It works. After adjusting a few settings the dome moves by itself for 3 seconds whenever it’s needed to move. The next step is to automate this with a programme like Nina or SGP. Astrobloke now says he has developed with another youtuber some open source software that does indeed work via Nina so it is now truly intergrated into his imaging process. This is something I will certainly like to look at but for now I am happy and content with pushing a button every 30 minutes,

The next and final part of the project will be dome shutter control open and close but for now no more getting up, going outside, no more accidental triggering of the neighbours lights, Lazy or what..


Monday, 14 March 2022

Moon 12th March 2022

Not my most favourite object in the night sky, Captured on Saturday night approx 21.03.
AVI capture at just 4 frames per second, hardy a high frame rate but best 90% of 300 frames for each


Sunday, 27 February 2022

Evolution of my Astro Imaging

 I would say I have been electronic imaging since 2005 with my first Canon camera that was
purchased in 

2005 Canon 300d a 6.3mp. 

2007 updated to a Canon 40d.


2014 Starlight Express Sxvm25


2019 Zwo ASO 294Mc Pro


2021 ZWO ASI1600mm


Sunday, 6 February 2022

Simies 147 Part 2

 A restart to the project of Simies 147, the previous below 4 pane mosaic was captured using data from the fantastic Telescopius website. It suggested that the 4 panes would work and stich together, as you can see further down that didn't work. So I have re planned a 6 pane mosaic with a greater 30% overlap. I ran a test with 2 frames and with a stretch and alignment in Photoshop and Bingo it works. I would like to run with more data looking at 4-5 hours on each frame, more data equals more signal and less noise. So below is the first run of 50 minutes data per frame. So far with so little data I am very pleased that there is the full shell on view. Shown in negative here you can see the joins and the noise is very apparent. Very happy so far.


Sunday, 30 January 2022

Simies 147


 New project time. I have never attempted this object before even with widefield DSLR.  Simeis 147, also known as the Spaghetti Nebula, or Sharpless 2-240, is a supernova remnant (SNR) in the Milky Way, so huge it straddles the border between the constellations Auriga and Taurus. Discovered in 1952 at the Crimean Astrophysical Observatory by Grigory Shajn and his team using a Schmidt camera and a narrowband filter that was close to the Hydrogen Alpha transmission line. It is difficult to observe due to its extremely low brightness. I honestly was not sure if I would be able to capture anything using 300 second exposures. My first attempt was a 4 pane mosaic using Telescopius to copy the CSV file and pasting it into the ASI air pro. As you can see things did not quite align with a 15% overlap.


My second go will be a 6 pane with a 30% overlap 

Hey Hey it's a Monkey

The Monkey Head Nebula is a star-forming region located 6,400 lightyears away in the Orion constellation.

NGC 2174, to give it is formal name, is a place where new stars are being born at a fierce and rapid rate, and these newly born stars emit powerful streams of charged particles known as stellar winds that blow the gas and dust away, removing the ingredients necessary for future stars to be born.

Dark dust streams among the glowing cosmic cloud to give the nebula its ape-like appearance.

The Monkey Head Nebula is an emission nebula, which means it is a cloud of gas that emits its own light. This is as opposed to a reflection nebula in which hot stars cause surrounding gas to glow.

It is associated with open star cluster NGC 2175 and can be found in the can be found in the Orion constellation.

We have below the Ha, S2 & Oiii  frames of 1Hr 30 Mins each.


Friday, 14 January 2022

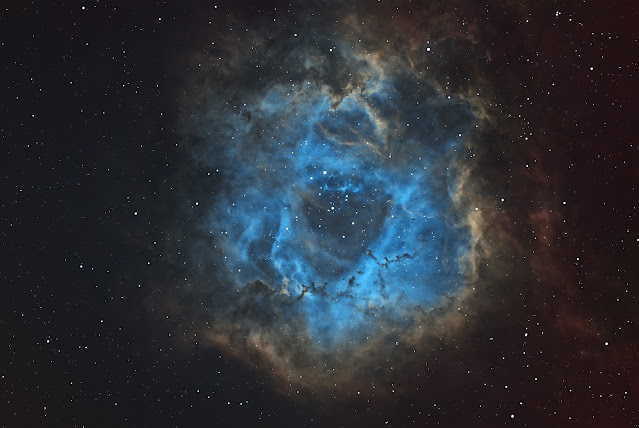
Rosette Nebula

 An 85% waxing gibbous moon phase is certainly a distraction for astrophotographers looking for faint fuzzies. But what can we do (launch a virgin rocket at it).. Thank goodness for the Ha filter, Because of the brightness of the sky background I reduced the exposure time to two minute subs and captured 4 hours worth of data. Imaging with the incredible ZWO ASI 2600MM and the 36mm filter wheel. I invested  also in a set of Optolong narrowband filters. I was incredibly impressed with the L- Enhance and it's ability to keep halo's and star sizes to a minimum. So for me it was a no brainer to add these to the arsenal. Saying that their LRGB filter set were new and untested at the time of purchase so I opted for the ZWO filter set. I am happy with them so far. But as I said the Ha filter was deployed last night and with a image stretch and dark dust enhancement I have a really clean image. Desperate for for some Oiii & Sii now.

Right so update alert last night was a clear night so had the opportunity to shoot 2 hours each on Oiii & Sii.

Processed on my new laptop and wow it is fast. 

Registered aligned & stacked in Deep Sky Stacker.

Starnet++

Processed in photoshop with

HSO colour mapped & selective colour

Levels & Curves

Photokemi astro tools Space dust & Dark details medium

Topaz denoise.


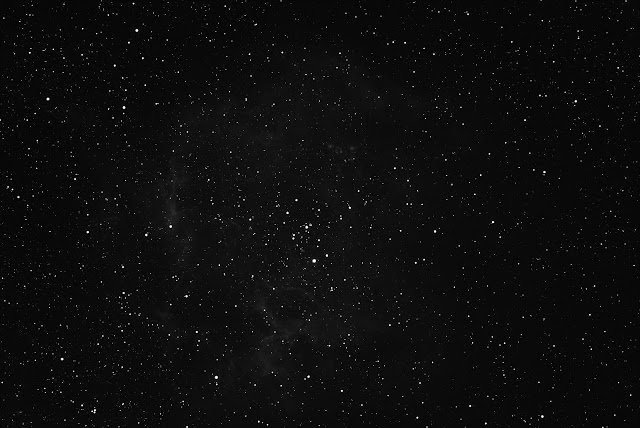
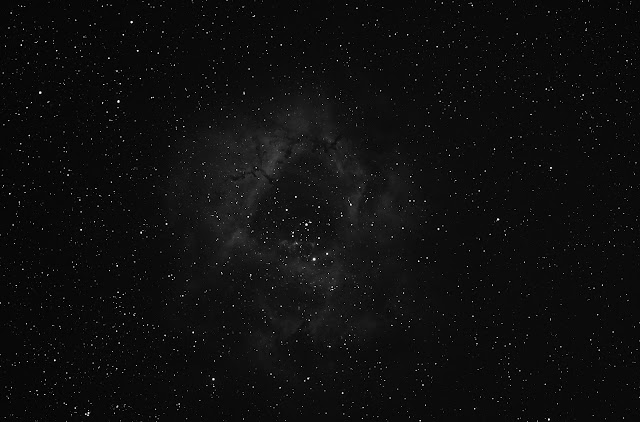
Ha

Oiii

Sii

Photo Details

  • Total Exposure: 9 Hours, 0 Minutes 120 x 2 Mins Ha , 30 x 3Mins Oiii, 30 x 3Mins Sii 
  • Image Acquisition: ZWO ASIair Pro
  • Camera Settings:  ZWO ASI2600mm pro Gain 100, 0°C
  • Accessories: ZWO 7 position Filter wheel
    •                Optolong narrowand filters 
    •                ZWO broadband filters
    •                ZWO EAF
  • Calibration Frames: No Calibration
  • Stacking and Processing: DeepSkyStacker, Adobe Photoshop 2020, 
  • Size: 2.26 x 1.38 deg 
  • Pixel Scale: 1.41 arcsec/pixel

Sunday, 9 January 2022

My Bucket list.

Ok so lets talk about distance particularly the speed light. 

In a vacuum,  we know that light travels at 670,616,629 mph. So If a little context is needed light from the moon takes 1.3 seconds to arrive at our eyes, Saturn is 1.3 light hours away a measly 0.0001505453985955772 light years distant. So what is a light year?

quite simply the distance light travels in a year 5,878,625,370,000 that's nearly 5.9 Trillion miles. Ok so back to the point I wanted to make IC434 or the Horsehead nebula is an immense cloud of thick dust obscuring star birth inside it and in galactic terms the Horsehead is an insignificant 3.5 light years in diameter but when you compare that against our solar system and our distance to Saturn it would be a huge two hundred and twenty one thousand three hundred and forty four (221,344) times the distance. 

If you ever needed reminding SPACE IS BIG.

My image was captured 2 nights ago at my home observatory with about 4 hours of data. Over the years I have taken many images of this target and I was lucky enough back in April of 2015 to appear in an episode of the Sky at night celebrating Hubble's 25 year Anniversary. One ticked off my bucket list anyway.


Stack of 40x 3 minute Ha frames.


My new laptop has amazing processing power, attempted several times previously to process a starnet++ starless image, it failed several times, introduce Mr Dell and it processes a colour starless image in less than 2 minutes, a chunk of star reduction and hey presto a lovely update to mt=y first process.


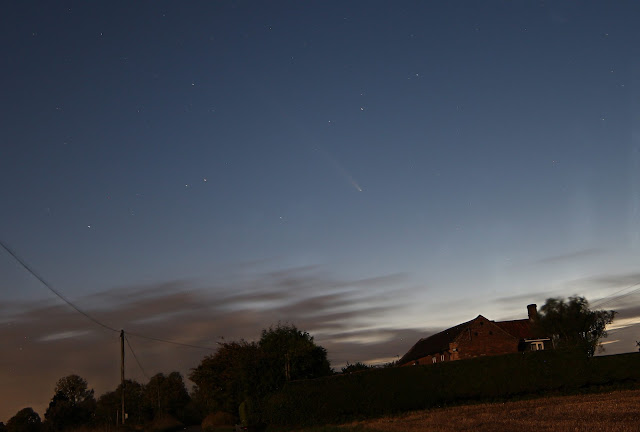
Comet Tsuchinshan-ATLAS, C/2023 A3 , Comet A3,

  A cosmic wanderer, Comet Tsuchinshan-Atlas or more commonly known as Comet A3 has traced its elliptical path through the solar system, a j...